There’s nothing worse than being trapped inside your own home. You’re late for work, barely managing to get all your things together and hop in your car when… the garage door won’t open. It’s a nightmare scenario that—with just a little bit of routine maintenance—you can likely avoid. Here are some simple steps that you can take to prevent your garage door from causing you undue stress.
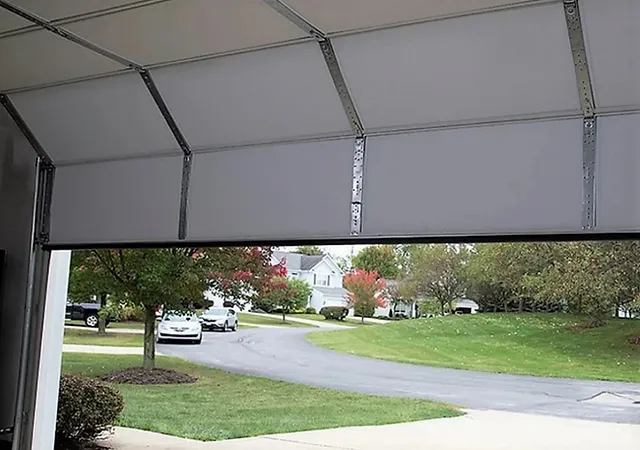
One of the first things you can do to preemptively diagnose problems with your garage door is, simply, to look at it. While just looking at your garage door obviously doesn’t solve anything, minor problems with your door can quickly escalate into major ones without a proper visual inspection. Check specifically for any cracks or dents in your door, as those are easy places for moisture to leak through and cause mold growth. You also want to scan over the weather stripping on the sides of your door, as it is crucial to sealing your garage away from the elements.
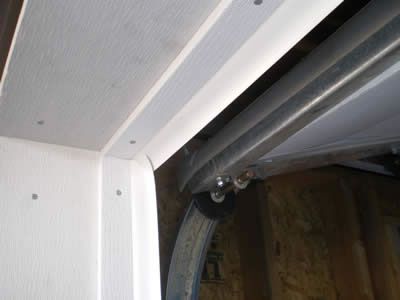
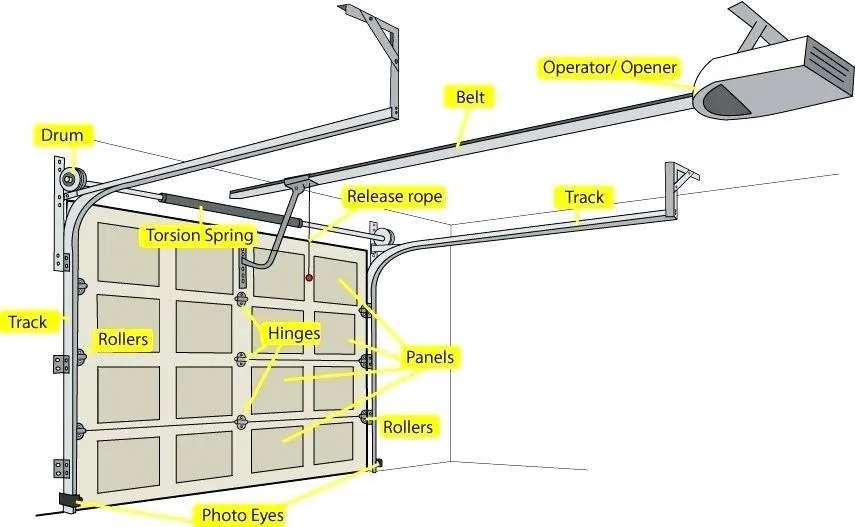
Another critical element of your garage door to inspect, particularly before performing any of the later tests mentioned here, is the torsion springs. The torsion springs are coiled directly above the door, and they are the part of the opening mechanism that stores the energy necessary to lift the door off the ground. If you notice cracks, breaks, or anything peculiar with your torsion springs, you will need to call a professional to fix the issue. This is because fixing torsion springs is incredibly dangerous, due to the immense amount of energy stored in the spring. It is a job that needs both special training and special tools.
Continuing your visual check-up, look over any parts that would be in motion if the garage door were to be lifted. This includes the rollers that travel along the tracks on either side of the door, the cables and pulleys along the ceiling that run to the center of the garage, as well as the hinges on the door itself. If anything, whether on these parts or otherwise, seems loose, make sure to tighten it before running further tests. Everything should be secure before we set the door in motion.
The very last step in your visual inspection should be to double check for rust. Even though most garage doors will be made to prevent rust, it can still occasionally occur over time. Whenever you notice rust, wipe the surface clean.
After you have looked over all those elements of your garage door, the next step is to lubricate the moving parts of both the garage door, as well as the garage door opener. This includes everything mentioned in the previous step—the rollers, the cables and pulleys, and the hinges. To lubricate these parts, first spray them with WD-40, then, after you’ve wiped them clean, you can apply some 3-in-1 oil as well. To ensure everything continues to run smoothly, this process should be repeated every three months.
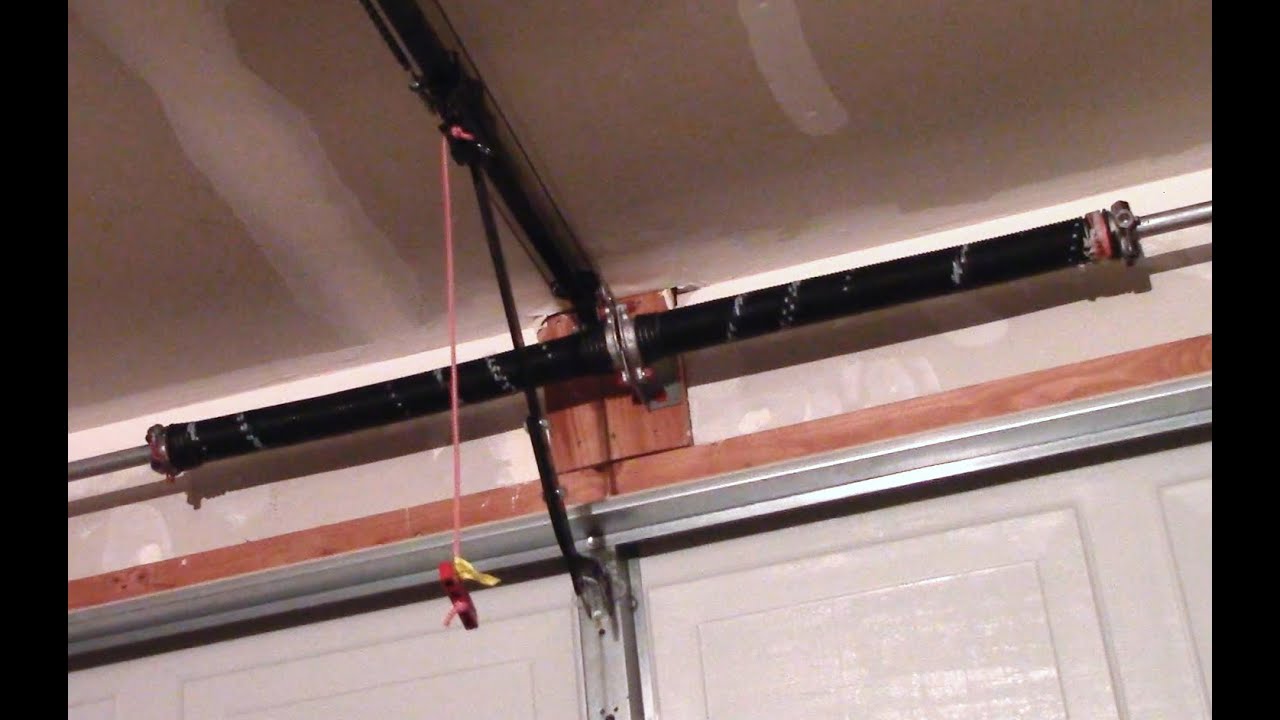
Now, you are finally ready to run some tests. The first aspect of your garage door that needs to be tested is the door’s balance. To test this, you must first be able to manually open your garage door. You can do this by first disengaging the door from the opening mechanism. First, ensure that the door is fully down before detaching it from the mechanism. This is an extremely important safety precaution, as if the door is up whilst you detach it, there is a chance that it could come crashing down, causing harm to the door as well as anyone in its way.
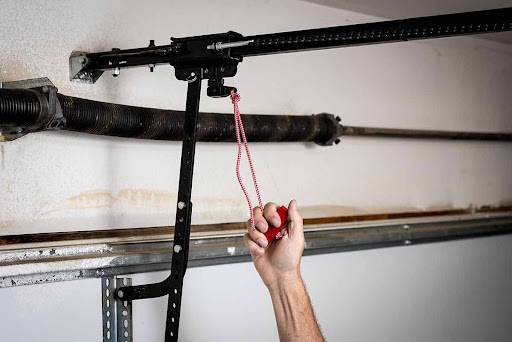
Once the door is down, you may pull the red string that hangs from the opening mechanism directly downwards. Doing so will detach the garage door from the mechanism and enable you to lift it up manually. Lift the door upwards using the handles at the bottom of the door. If the door feels too heavy to lift, do not continue to lift it upward. It should be relatively easy to lift off the ground. To test whether your door is balanced, lift the door to about the halfway point, and then carefully let go of the door. If the door remains in the halfway position after being let go, it is correctly balanced. If not, you will need to call a professional to fix the issue.
Once you have checked the balance of your door, you will need to re-engage the door. To do this, simply return the door to its original position (all the way down), and pull the red string away from the door. This should hook the door back into the opening mechanism. Once you have done that, there’s one thing left to do—test the door’s sensors.
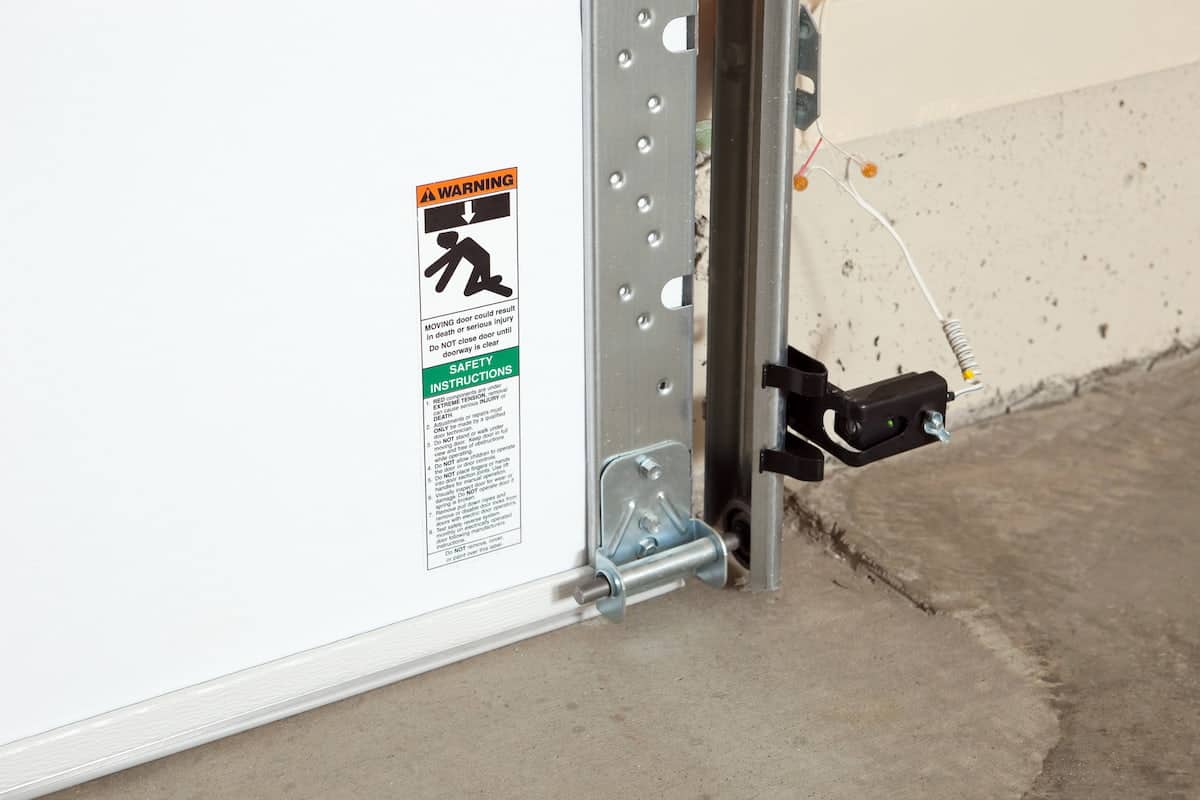
To test the sensors, simply open the door, and then close it again using the automatic opener. Before the door starts to close, slide an object along the floor, under the door and in front of the door’s sensors. The door should sense that there is an object in the way, and immediately start reversing back upward to avoid the object. If your door does not recognize the object, check your sensors for any dust and grime that might be covering them, or any other objects that could be in their way. If your sensors are clean and clear of blockage, you may have to enlist professional help to fix them.
Once you have completed that last test, you are officially done with your garage door maintenance! To ensure everything you checked during these steps stays operational, it is recommended that you go through this entire process once a year, while lubricating the moving parts every three months, as mentioned before. We hope these tips help you better care for and understand your home’s garage door!